Vista elenco

Kubernetes on Bare Metal for Maximum Performance

14 Ottobre 2025 ore 15:00

When teams consider deploying Kubernetes, one of the first questions that arises is: where should it run? The default answer is often the public cloud, thanks to its flexibility and ease of use. However, a growing number of organizations are revisiting the advantages of running Kubernetes directly on bare metal servers. For workloads that demand maximum performance, predictable latency, and direct hardware access, bare metal Kubernetes can achieve results that virtualized or cloud-hosted environments simply cannot match.

Why Bare Metal Still Matters

Virtualization and cloud abstractions have delivered convenience, but they also introduce overhead. By eliminating the virtualization layer, applications gain direct access to CPUs, memory, storage devices, and network interfaces. This architectural difference translates into tangible benefits:

  • Near-Native Performance – Applications can leverage the full power of the hardware, experiencing minimal overhead from hypervisors or cloud APIs. (Cloud Native Bare Metal Report, CNCF 2023)
  • Predictable Latency – A critical factor in industries such as real-time analytics, telecommunications, and financial trading, where even microseconds matter.
  • Efficient Hardware Utilization – GPUs, NVMe storage, or SmartNICs can be accessed directly, without restrictions or performance bottlenecks introduced by virtualization.
  • Cost Optimization – For workloads that are steady and long-term, owning and operating bare metal servers can be significantly more cost-effective than continuously paying cloud provider bills (IDC: Bare Metal Economics).
  • Deep Infrastructure Control – Operators can configure firmware, tune networking, and manage storage directly, without depending on the abstractions and limitations imposed by cloud environments.

Bare metal provides power and control, but it comes with its own challenge: managing servers at scale. This is precisely where Bare Metal as a Service (BMaaS) steps in.

Bare Metal as a Service with metal-stack.io

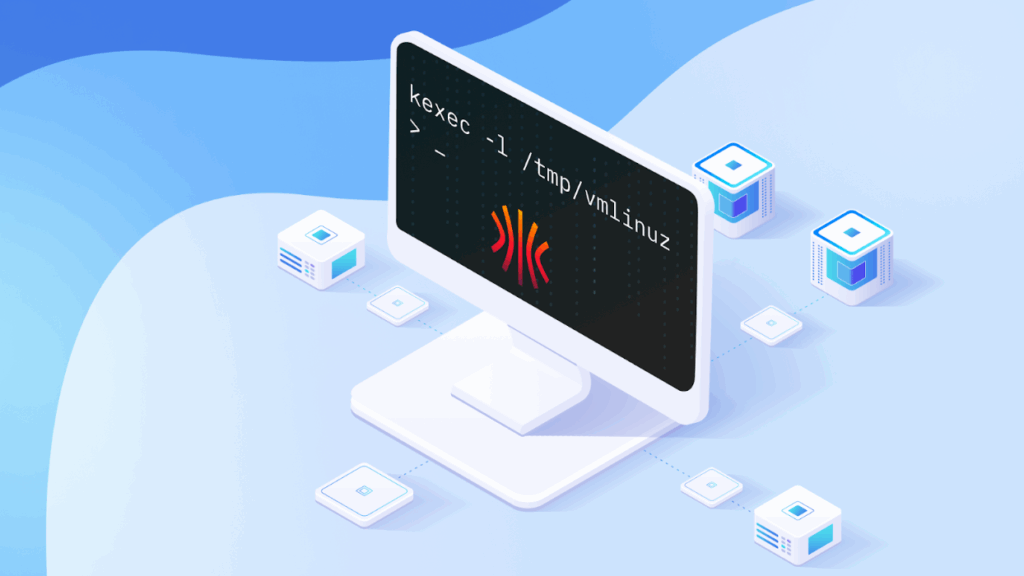
metal-stack is an open-source platform that makes bare metal infrastructure as easy to consume as cloud resources. It provides a self-service model for physical servers, automating provisioning, networking, and lifecycle management. Essentially, it transforms racks of hardware into a cloud-like environment—while retaining the performance advantages of bare metal.

Key capabilities of metal-stack.io include:

  • Automated Provisioning – Servers can be deployed with clean, reproducible operating system images, similar to how VMs are created in cloud environments.
  • Integrated Networking – With BGP-based routing and compatibility with Kubernetes CNI plugins like Cilium or Calico, metal-stack ensures high-performance and secure networking. Load balancing can be handled with MetalLB.
  • Multi-Tenant Support – Physical machines can be securely assigned to different teams or projects, enabling isolation and resource fairness.
  • Kubernetes-Native Integration – Kubernetes clusters can be provisioned directly onto bare metal nodes via metal-ccm, Gardener, or the Cluster API Provider for Metal-Stack (CAPMS).
  • Open Source Foundation – The entire stack is open source (MIT/AGPL), ensuring transparency, avoiding vendor lock-in, and allowing teams to adapt the system to their unique needs.

By using metal-stack.io, organizations don’t need to compromise between the raw speed of bare metal and the automation of cloud infrastructure—they can have both.

Building the Bare Metal Kubernetes Stack

Deploying Kubernetes on bare metal requires assembling several components into a complete ecosystem. With metal-stack at the foundation, additional layers ensure resilience, security, and operational visibility:

  • Networking – Pair metal-stack’s BGP routing with a Kubernetes CNI like Cilium for low-latency, policy-driven communication.
  • Storage – Tools like Rook (Ceph) or OpenEBS create distributed, high-speed storage pools that can survive node failures.
  • Observability – Monitoring with Prometheus, and logging with Loki or ELK, provide the insights needed to manage both hardware and workloads effectively.
  • Security – Without the isolation of virtualization, it becomes essential to enforce RBAC, Pod Security Standards, and strict network policies.
  • Lifecycle Management – While metal-stack automates the server lifecycle, Kubernetes operators and GitOps tools (e.g., ArgoCD or Flux) help automate application deployment and ongoing operations.

This layered approach turns bare metal clusters into production-ready platforms capable of handling enterprise-grade workloads.

Real-World Use Cases

Bare metal Kubernetes shines in scenarios where hardware performance and low latency are non-negotiable. Some standout use cases include:

  • AI/ML Training – Direct access to GPUs accelerates machine learning model training and inference workloads (NVIDIA on Bare Metal).
  • Telecom & 5G Networks – Edge deployments and network functions demand ultra-low latency and predictable performance.
  • Financial Services – High-frequency trading and other time-sensitive platforms benefit from microsecond-level predictability.
  • Enterprise Databases – Systems like PostgreSQL or Cassandra achieve higher throughput and stability when running directly on bare metal.

In each of these cases, bare metal Kubernetes provides both the performance edge and the flexibility of modern orchestration.

Getting Started with metal-stack.io

For organizations interested in exploring this model, the path forward is straightforward:

  1. Explore the metal-stack.io documentation to understand the architecture and requirements.
  2. Start small with a handful of bare metal servers to build a test cluster.
  3. Use metal-stack’s Kubernetes integration to deploy a working cluster on these nodes.
  4. Benchmark workloads against equivalent cloud-based environments to validate performance gains.
  5. Scale gradually, adding automation and expanding infrastructure as the needs grow.

This incremental approach reduces risk and allows teams to build confidence before moving critical workloads.

Conclusion & Next Steps

Running Kubernetes on bare metal delivers unmatched performance, efficiency, and control—capabilities that virtualized and cloud-based environments cannot fully replicate. Thanks to open-source solutions like metal-stack.io, organizations no longer need to choose between raw power and operational simplicity. Bare Metal as a Service (BMaaS) extends the agility of the cloud to physical servers, enabling DevOps teams to manage Kubernetes clusters that are faster, more predictable, and fully under their control.

Ready to explore further?

For high-performance computing, latency-sensitive applications, and hardware-intensive workloads, Kubernetes on bare metal is not just an alternative—it is often the best choice.

The post Kubernetes on Bare Metal for Maximum Performance appeared first on Linux.com.

A Simple Way to Install Talos Linux on Any Machine, with Any Provider

28 Aprile 2025 ore 01:40

Talos Linux is a specialized operating system designed for running Kubernetes. First and foremost it handles full lifecycle management for Kubernetes control-plane components. On the other hand, Talos Linux focuses on security, minimizing the user’s ability to influence the system. A distinctive feature of this OS is the near-complete absence of executables, including the absence of a shell and the inability to log in via SSH. All configuration of Talos Linux is done through a Kubernetes-like API.

Talos Linux is provided as a set of pre-built images for various environments.

The standard installation method assumes you will take a prepared image for your specific cloud provider or hypervisor and create a virtual machine from it. Or go the bare metal route and load  the Talos Linux image using ISO or PXE methods.

Unfortunately, this does not work when dealing with providers that offer a pre-configured server or virtual machine without letting you upload a custom image or even use an ISO for installation through KVM. In that case, your choices are limited to the distributions the cloud provider makes available.

Usually during the Talos Linux installation process, two questions need to be answered: (1) How to load and boot the Talos Linux image, and (2) How to prepare and apply the machine-config (the main configuration file for Talos Linux) to that booted image. Let’s talk about each of these steps.

Booting into Talos Linux

One of the most universal methods is to use a Linux kernel mechanism called kexec.

kexec is both a utility and a system call of the same name. It allows you to boot into a new kernel from the existing system without performing a physical reboot of the machine. This means you can download the required vmlinuz and initramfs for Talos Linux, and then, specify the needed kernel command line and immediately switch over to the new system. It is as if the kernel were loaded by the standard bootloader at startup, only in this case your existing Linux operating system acts as the bootloader.

Essentially, all you need is any Linux distribution. It could be a physical server running in rescue mode, or even a virtual machine with a pre-installed operating system. Let’s take a look at a case using Ubuntu on, but it can be literally any other Linux distribution.

Log in via SSH and install the kexec-tools package, it contains the kexec utility, which you’ll need later:

apt install kexec-tools -y

Next, you need to download the Talos Linux, that is the kernel and initramfs. They can be downloaded from the official repository:

wget -O /tmp/vmlinuz https://github.com/siderolabs/talos/releases/latest/download/vmlinuz-amd64
wget -O /tmp/initramfs.xz https://github.com/siderolabs/talos/releases/latest/download/initramfs-amd64.xz

If you have a physical server rather than a virtual one, you’ll need to build your own image with all the necessary firmware using Talos Factory service. Alternatively, you can use the pre-built images from the Cozystack project (a solution for building clouds we created at Ænix and transferred to CNCF Sandbox) – these images already include all required modules and firmware:

wget -O /tmp/vmlinuz https://github.com/cozystack/cozystack/releases/latest/download/kernel-amd64
wget -O /tmp/initramfs.xz https://github.com/cozystack/cozystack/releases/latest/download/initramfs-metal-amd64.xz

Now you need the network information that will be passed to Talos Linux at boot time. Below is a small script that gathers everything you need and sets environment variables:

IP=$(ip -o -4 route get 8.8.8.8 | awk -F"src " '{sub(" .*", "", $2); print $2}')
GATEWAY=$(ip -o -4 route get 8.8.8.8 | awk -F"via " '{sub(" .*", "", $2); print $2}')
ETH=$(ip -o -4 route get 8.8.8.8 | awk -F"dev " '{sub(" .*", "", $2); print $2}')
CIDR=$(ip -o -4 addr show "$ETH" | awk -F"inet $IP/" '{sub(" .*", "", $2); print $2; exit}')
NETMASK=$(echo "$CIDR" | awk '{p=$1;for(i=1;i<=4;i++){if(p>=8){o=255;p-=8}else{o=256-2^(8-p);p=0}printf(i<4?o".":o"\n")}}')
DEV=$(udevadm info -q property "/sys/class/net/$ETH" | awk -F= '$1~/ID_NET_NAME_ONBOARD/{print $2; exit} $1~/ID_NET_NAME_PATH/{v=$2} END{if(v) print v}')

You can pass these parameters via the kernel cmdline. Use ip= parameter to configure the network using the Kernel level IP configuration mechanism for this. This method lets the kernel automatically set up interfaces and assign IP addresses during boot, based on information passed through the kernel cmdline. It’s a built-in kernel feature enabled by the CONFIG_IP_PNP option. In Talos Linux, this feature is enabled by default. All you need to do is provide a properly formatted network settings in the kernel cmdline.

Set the CMDLINE variable with the ip option that contains the current system’s settings, and then print it out:

CMDLINE="init_on_alloc=1 slab_nomerge pti=on console=tty0 console=ttyS0 printk.devkmsg=on talos.platform=metal ip=${IP}::${GATEWAY}:${NETMASK}::${DEV}:::::"
echo $CMDLINE

The output should look something like:

init_on_alloc=1 slab_nomerge pti=on console=tty0 console=ttyS0 printk.devkmsg=on talos.platform=metal ip=10.0.0.131::10.0.0.1:255.255.255.0::eno2np0:::::

Verify that everything looks correct, then load our new kernel:

kexec -l /tmp/vmlinuz --initrd=/tmp/initramfs.xz --command-line="$CMDLINE"
kexec -e

The first command loads the Talos kernel into RAM, the second command switches the current system to this new kernel.

As a result, you’ll get a running instance of Talos Linux with networking configured. However it’s currently running entirely in RAM, so if the server reboots, the system will return to its original state (by loading the OS from the hard drive, e.g., Ubuntu).

Applying machine-config and installing Talos Linux on disk

To install Talos Linux persistently on the disk and replace the current OS, you need to apply a machine-config specifying the disk to install. To configure the machine, you can use either the official talosctl utility or the Talm, utility maintained by the Cozystack project (Talm works with vanilla Talos Linux as well).

First, let’s consider configuration using talosctl. Before applying the config, ensure it includes network settings for your node; otherwise, after reboot, the node won’t configure networking. During installation, the bootloader is written to disk and does not contain the ip option for kernel autoconfiguration.

Here’s an example of a config patch containing the necessary values:

# node1.yaml
machine:
  install:
    disk: /dev/sda
  network:
    hostname: node1
    nameservers:
    - 1.1.1.1
    - 8.8.8.8
    interfaces:
    - interface: eno2np0
      addresses:
      - 10.0.0.131/24
      routes:
      - network: 0.0.0.0/0
        gateway: 10.0.0.1

You can use it to generate a full machine-config:

talosctl gen secrets
talosctl gen config --with-secrets=secrets.yaml --config-patch-control-plane=@node1.yaml <cluster-name> <cluster-endpoint>

Review the resulting config and apply it to the node:

talosctl apply -f controlplane.yaml -e 10.0.0.131 -n 10.0.0.131 -i 

Once you apply controlplane.yaml, the node will install Talos on the /dev/sda disk, overwriting the existing OS, and then reboot.

All you need now is to run the bootstrap command to initialize the etcd cluster:

talosctl --talosconfig=talosconfig bootstrap -e 10.0.0.131 -n 10.0.0.131

You can view the node’s status at any time using dashboard commnad:

talosctl --talosconfig=talosconfig dashboard -e 10.0.0.131 -n 10.0.0.131

As soon as all services reach the Ready state, retrieve the kubeconfig and you’ll be able to use your newly installed Kubernetes:

talosctl --talosconfig=talosconfig kubeconfig kubeconfig
export KUBECONFIG=${PWD}/kubeconfig

Use Talm for configuration management

When you have a lot of configs, you’ll want a convenient way to manage them. This is especially useful with bare-metal nodes, where each node may have different disks, interfaces and specific network settings. As a result, you might need to hold a patch for each node.

To solve this, we developed Talm — a configuration manager for Talos Linux that works similarly to Helm.

The concept is straightforward: you have a common config template with lookup functions, and when you generate a configuration for a specific node, Talm dynamically queries the Talos API and substitutes values into the final config.

Talm includes almost all of the features of talosctl, adding a few extras. It can generate configurations from Helm-like templates, and remember the node and endpoint parameters for each node in the resulting file, so you don’t have to specify these parameters every time you work with a node.

Let me show how to perform the same steps to install Talos Linux using Talm:

First, initialize a configuration for a new cluster:

mkdir talos
cd talos
talm init

Adjust values for your cluster in values.yaml:

endpoint: "https://10.0.0.131:6443"
podSubnets:
- 10.244.0.0/16
serviceSubnets:
- 10.96.0.0/16
advertisedSubnets:
- 10.0.0.0/24

Generate a config for your node:

talm template -t templates/controlplane.yaml -e 10.0.0.131 -n 10.0.0.131 > nodes/node1.yaml

The resulting output will look something like:

# talm: nodes=["10.0.0.131"], endpoints=["10.0.0.131"], templates=["templates/controlplane.yaml"]
# THIS FILE IS AUTOGENERATED. PREFER TEMPLATE EDITS OVER MANUAL ONES.
machine:
  type: controlplane
  kubelet:
    nodeIP:
      validSubnets:
        - 10.0.0.0/24
  network:
    hostname: node1
    # -- Discovered interfaces:
    # eno2np0:
    #   hardwareAddr:a0:36:bc:cb:eb:98
    #   busPath: 0000:05:00.0
    #   driver: igc
    #   vendor: Intel Corporation
    #   product: Ethernet Controller I225-LM)
    interfaces:
      - interface: eno2np0
        addresses:
          - 10.0.0.131/24
        routes:
          - network: 0.0.0.0/0
            gateway: 10.0.0.1
    nameservers:
      - 1.1.1.1
      - 8.8.8.8
  install:
    # -- Discovered disks:
    # /dev/sda:
    #    model: SAMSUNG MZQL21T9HCJR-00A07
    #    serial: S64GNG0X444695
    #    wwid: eui.36344730584446950025384700000001
    #    size: 1.9 TB
    disk: /dev/sda
cluster:
  controlPlane:
    endpoint: https://10.0.0.131:6443
  clusterName: talos
  network:
    serviceSubnets:
      - 10.96.0.0/16
  etcd:
    advertisedSubnets:
      - 10.0.0.0/24

All that remains is to apply it to your node:

talm apply -f nodes/node1.yaml -i 


Talm automatically detects the node address and endpoint from the “modeline” (a conditional comment at the top of the file) and applies the config.

You can also run other commands in the same way without specifying node address and endpoint options. Here are a few examples:

View the node status using the built-in dashboard command:

talm dashboard -f nodes/node1.yaml

Bootstrap etcd cluster on node1:

talm bootstrap -f nodes/node1.yaml

Save the kubeconfig to your current directory:

talm kubeconfig kubeconfig -f nodes/node1.yaml

Unlike the official talosctl utility, the generated configs do not contain secrets, allowing them to be stored in git without additional encryption. The secrets are stored at the root of your project and only in these files: secrets.yaml, talosconfig, and kubeconfig.

Summary

That’s our complete scheme for installing Talos Linux in nearly any situation. Here’s a quick recap:

  1. Use kexec to run Talos Linux on any existing system.
  2. Make sure the new kernel has the correct network settings, by collecting them from the current system and passing via the ip parameter in the cmdline. This lets you connect to the newly booted system via the API.
  3. When the kernel is booted via kexec, Talos Linux runs entirely in RAM. To install Talos on disk, apply your configuration using either talosctl or Talm.
  4. When applying the config, don’t forget to specify network settings for your node, because on-disk bootloader configuration doesn’t automatically have them.
  5. Enjoy your newly installed and fully operational Talos Linux.

Additional materials:

The post A Simple Way to Install Talos Linux on Any Machine, with Any Provider appeared first on Linux.com.

❌